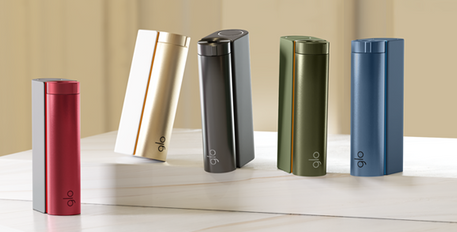
Troubleshooting the glo devices
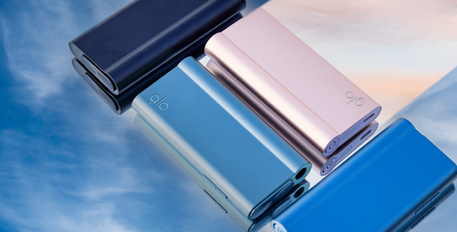
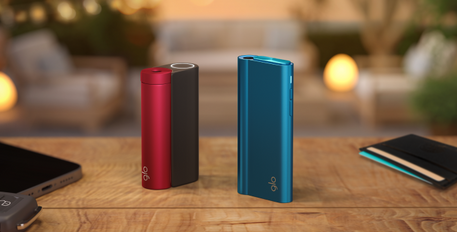
The glo Hyper Air and glo Hyper X2 are cutting-edge devices designed to elevate user experiences with their advanced features. As with all modern gadgets, there are times when users might encounter issues or anomalies. Understanding these devices and the steps involved in troubleshooting can be instrumental in ensuring a smooth and uninterrupted experience.
Understanding the fundamentals of the glo Hyper Air and glo Hyper X2, as well as the significance of the troubleshooting process, can save users both time and potential frustrations. This article seeks to provide a clear, concise guide to assist you in those moments of need.
Understanding Your glo Device Warranty
Each glo device comes with a legal guarantee that affirms its quality, reliability, and performance. This guarantee lasts for a specific duration, as specified in the product documentation, ensuring that you are protected against defects and certain issues.
To derive maximum benefit from this guarantee, it's crucial to register your glo device. Registration typically involves providing some basic details about your device and proof of purchase. By doing so, you not only validate your warranty but also streamline the process should you need any assistance or service in the future. It's a step that reaffirms your commitment to the device and its optimal functioning.
Device Registration Process
Registering your glo device is an essential step to fully leverage its benefits and ensure a smooth after-sales experience. Here’s a simple guide to walk you through the process on our website.
Step-by-Step Guide to Register:
- Navigate to the Website: Open your browser and type in [discoverglo.com]. Wait for the homepage to load.
- Find the Registration Section: Typically, there will be a 'Register' or 'Sign Up' button on the top right corner or within the main menu. Click on it.
- Enter Device Details: You will be prompted to provide details about your glo device, such as its model, serial number, and date of purchase.
- Personal Information: Fill in your personal details, including your name, email address, and contact number.
- Proof of Purchase: Some registration processes might require you to upload a copy of your purchase receipt or provide other purchase details.
- Confirmation: After filling in all the details, click on the 'Submit' or 'Register' button. You might receive a confirmation email to verify your email address. Click on the provided link to complete the registration process.
- Log in to Your Account: Once registered, you can log in to your account to manage your device, access warranty details, and avail yourself of customer support.
Advantages of Registering Your Device
Taking the extra step of registering your device offers a myriad of advantages. Beyond just activating your warranty, here are some of the notable benefits you stand to gain:
- Warranty Activation: Ensures that you're covered for repairs or replacements as per the warranty terms.
- Faster Support: With your device details readily available in the system, you can expect a more streamlined support experience.
- Preliminary Troubleshooting Questions
Before diving deep into specific troubleshooting techniques or reaching out for professional assistance, it's wise to cross-check some fundamental aspects of your device's operation. These preliminary questions can help you narrow down the issue and might even provide a quick fix:
- Is the device powered on and adequately charged?
- Have all connections, cables, or accessories been checked for proper fit?
- Is the device's software or firmware up to date?
- Did you refer to the user manual for basic troubleshooting tips?
- If paired with other devices, are they functioning correctly?
- Have you tried restarting the device?
General Troubleshooting Steps for Both Devices
Having navigated through the preliminary questions discussed in the previous section, you're now equipped with a basic understanding of your device's current state. However, if the problems persist, it's time to delve deeper into specific troubleshooting techniques tailored for both the glo Hyper Air and glo Hyper X2 devices. Follow these systematic steps to address and resolve common issues:
Power and Charging Troubles: Getting to the Root
When the Device Won't Charge: Begin your troubleshooting journey by addressing the basics.
Step 1: The Outlet Test First and foremost, examine the power outlet. Sometimes, the simplest problems have the simplest solutions. Plug in a different device and see if the outlet is indeed working. If there's no power, you've identified your issue!
Step 2: Cord Compatibility Your glo device is unique, and so is its charging cord. Always opt for the original cable that came packaged with it. Third-party chargers might not always be compatible and can even damage your device. Plus, while it's plugged in, keep a keen eye on those LED lights. They're not just for show; they can tell you a lot about how your charging process is faring.
The Activation and Performance Saga
Is Your Device Feeling Sluggish? Let’s Rev It Up!
Step 5: Verifying the Session Here’s where things heat up. Literally. Your device should produce steam consistently. The lights, meanwhile, should be in sync with what the manual suggests. If they're playing a different tune, you might have a problem.
Step 6: Ensuring Session Longevity, you started your session; great! But does your device stay the course? Ensure that it gives you a full session without any unexpected drop in efficiency or a sudden shutdown.
Step 7: Shutting Down Smoothly Like a good curtain call at the end of a play, your device’s LEDs should indicate a smooth and successful shutdown. If they continue their performance even after the device is off or blink erratically, it's time to investigate further.
Understanding LED Indicators for glo Devices
LED indicators serve as a communication channel between the user and the glo device. Here's a quick guide to help you understand and respond promptly:
glo Hyper Air LED:
- Red Flash (3 times): Battery is too low. Charge using the original adapter and USB-C cable.
- Purple Flash (twice) + Dual Vibration: Device is too cold. Use at room temperature.
- Purple Flash (once) + Single Vibration: Device is overheated. Let it cool for 15 minutes before reuse.
- Pink Flash (once) + Extended Vibration: Self-diagnosis error. Reset by holding the boost mode button for 8 seconds.
glo Hyper X2 LED:
- Flashing Diameter: Low battery charge. Recharge using the USB-C cable. Check charge level with the Standard or Boost button.
- Alternate Right and Left Flashing: Device isn't heating tobacco due to premature button pressing. Turn off, wait 90 seconds, and restart.
- Different Sides Illumination: Temperature malfunction due to extreme hot or cold exposure. If overheated, cool the device. If it's too cold, warm it until the battery recharges.
Other Common Issues
It's natural for devices to warm up during operation, but if it's too hot to touch, turn it off and let it cool down. Ensure you're using the device in a well-ventilated area and not covering any essential vents.
Moreover, while a slight change in the consumables' coloration is normal, watch out for blackened or overly browned spots. This can indicate overheating or a malfunction. Regular maintenance, such as cleaning and replacing consumables, ensures longevity and peak performance.
Remember, while troubleshooting can resolve many issues, always refer back to your warranty and customer support if the problems persist or if you're unsure about any step. Your device's health and your safety should always be the top priority.
Replacement Process for Defective Devices
Understanding the procedure for device replacement is essential, especially if you suspect a defect. In this section, we'll guide you through the necessary steps and underscore the importance of being a registered consumer.
Detailed Step-by-Step Guide for the Replacement Process:
- Initial Contact: Begin by reaching out to the glo call center. Have your device details and registration information at hand to provide to the representative.
- Device Verification: The representative will ask a series of questions to confirm the defect and determine whether the device qualifies for a replacement.
- Replacement Approval: If your device is confirmed defective and under warranty, you'll receive approval for a replacement.
- Packaging & Shipping: Carefully package the defective device, including all accessories, and send it to the address provided. The representative will inform you if shipping costs are covered.
- Receiving a New Device: Upon receipt and inspection of your returned item, glo will dispatch a new device to your registered address. Expect an email with tracking details.
How to Manage Exceptions in the Replacement Process
There might be instances where the process doesn't proceed as smoothly as anticipated. In such cases, always keep a record of your communications, including names of representatives and call dates. If your device is out of warranty but exhibits extreme defects shortly after the warranty expires, it’s worth discussing potential exceptions with the company. For any unique circumstances (e.g., relocating between the return and replacement process), communicate promptly with the customer service team to ensure a smooth transition.
Conclusion
Understanding the intricacies of your glo device is invaluable, from troubleshooting minor hiccups to navigating the replacement of defective units. As a responsible consumer, regularly maintaining and checking your device not only enhances its longevity but ensures optimal performance. And always remember, the Glo team is just a call away, ready to support and guide you through any challenges.


